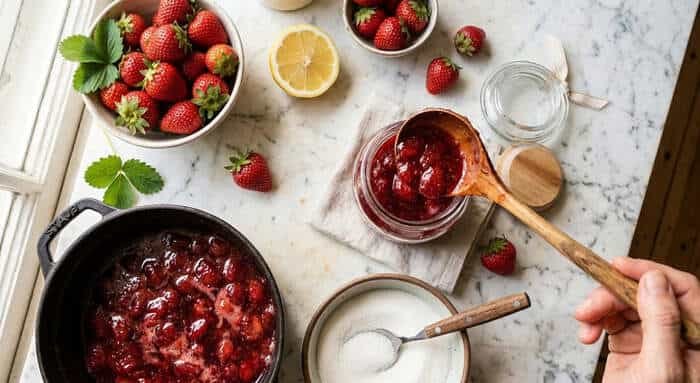
You have spent the afternoon cooking fresh mango, strawberry or mixed-fruit jam. The jars are filled, the kitchen smells wonderful, and the lids are ready. At this stage, it is tempting to think that because the jam was already boiling hot, you can simply tighten the lids and put the jars in the cupboard. For shelf-stable homemade jam, however, proper water-bath processing is an essential final step.
For many tested traditional jam recipes in half-pint or pint jars, the boiling-water processing time is 5 minutes at elevations up to 1,000 feet (305 metres) when using pre-sterilized jars. The time increases with altitude. Some recipes call for 10 minutes or longer, particularly when jars were not pre-sterilized or when the recipe has different ingredients. The safest rule is therefore not “all jam gets five minutes,” but follow the processing time in a tested canning recipe exactly.
This distinction is especially useful in India, where homemade preserves vary widely and elevation ranges from coastal cities to high-altitude Himalayan towns.
Homemade Jam Water-Bath Canning Time: Quick Overview
| Situation | Practical Guidance |
|---|---|
| Traditional tested jam, half-pint/pint jars | Often 5 minutes at 0–1,000 ft |
| Elevation 1,001–6,000 ft | Some tested jam recipes specify 10 minutes |
| Above 6,000 ft | Some tested jam recipes specify 15 minutes |
| Non-sterile jars | Process at least 10 minutes when the tested recipe permits |
| Reduced-sugar or special jam | Follow its specific tested recipe |
| Water level | At least 1 inch above jar tops |
| When timing starts | When water returns to a full boil |
| If boiling stops | Return to full boil and restart processing time |
| Headspace for many jams | About ¼ inch |
| Cooling after processing | Leave undisturbed for 12–24 hours |
| Storage | Only properly sealed, safely processed jars are shelf-stable |
Is 5 Minutes Enough to Water Bath Can Jam?
It can be—but only for the right recipe and conditions.
The National Center for Home Food Preservation’s tested recipes for many traditional jams with added pectin specify 5 minutes for half-pint or pint jars at elevations of 0–1,000 feet, increasing to 10 minutes at 1,001–6,000 feet and 15 minutes above 6,000 feet.
The same general processing schedule appears for several tested jams made without added pectin.
However, a five-minute process normally requires sterile jars. When a tested recipe uses a processing time of less than 10 minutes, empty jars need to be sterilized beforehand.
If jars will be processed for 10 minutes or longer, pre-sterilizing empty jars is generally unnecessary, although they should still be clean and hot.
The recipe remains your primary authority because not every fruit spread uses the same processing schedule.
Why Does Homemade Jam Need Water-Bath Processing?
Traditional jam is generally high in acid and sugar, which is why properly formulated recipes are suitable for boiling-water canning.
But filling a hot jar and tightening its lid is not the same as properly processing it.
Water-bath canning helps destroy spoilage organisms, drives air from the jar and enables the lid to form a reliable vacuum seal during cooling.
Old-fashioned methods such as simply turning filled jars upside down or sealing jam with paraffin wax are no longer recommended for shelf-stable home preservation.
Even sugary jam can develop mould. If mould appears, do not scrape off the top and eat what remains. Discard the affected product.
When Do You Start Counting the Processing Time?
This small detail is extremely important.
Imagine that your recipe requires 10 minutes. You lower six hot jars into the canner and immediately start your phone timer.
That is incorrect.
Adding jars can temporarily reduce the water temperature. Wait until the water returns to a vigorous boil, then start the processing timer.
Keep the canner covered and maintain a complete boil for the entire required period.
If the water stops boiling during processing, bring it back to a vigorous boil and restart the processing time from the beginning.
So a recipe specifying 10 minutes means 10 continuous minutes at the required boiling-water conditions—not 10 minutes from the moment the jars enter the pot.
How Much Water Should Cover the Jars?
The jars must be completely submerged.
For normal shorter processes, keep at least 1 inch (about 2.5 cm) of water above the jar tops. For processes longer than 30 minutes, guidance recommends approximately 2 inches above them.
You do not necessarily need a specialised canning pot.
A sufficiently deep stockpot can work if it allows the jars to remain upright, keeps them from sitting directly against the bottom and provides enough space for water to cover them adequately.
A proper jar rack is convenient. If improvising equipment, ensure the jars remain stable and separated from direct contact with the pot base.
Why Altitude Changes Canning Time
Altitude is particularly important for Indian readers.
Water boils at a lower temperature as elevation increases. That means boiling-water processing becomes less effective at a given amount of time, so higher-altitude locations require longer processing.
For tested jam recipes that specify:
- 0–1,000 ft: 5 minutes
- 1,001–6,000 ft: 10 minutes
- Above 6,000 ft: 15 minutes
use the time appropriate to your elevation.
Do not assume the instructions used in Mumbai, Chennai or Kolkata automatically apply unchanged in Shimla, Manali or other high-altitude locations.
More general water-bath canning recipes may use different altitude-adjustment tables, so always apply the adjustment specified with the tested recipe you are following.
What About Low-Sugar and No-Sugar Jam?
This is where improvisation becomes risky.
Sugar affects more than sweetness. It influences gel formation, preservation characteristics and the final product.
You should not simply take a conventional strawberry jam recipe, dramatically reduce the sugar and assume its original processing instructions remain valid.
Special low- or no-sugar pectins are available, but they come with recipes formulated specifically for those products.
The National Center for Home Food Preservation notes that reduced-sugar products made with modified pectins may require longer processing times.
If you want shelf-stable low-sugar jam, use a tested recipe specifically developed for reduced-sugar canning.
Otherwise, make a refrigerator or freezer jam and store it accordingly.
Step-by-Step Water-Bath Method for Jam
Prepare your jam using a tested home-canning recipe and use proper canning jars with compatible two-piece lids.
Keep the jars hot before filling to reduce the chance of thermal shock.
Fill each jar with hot jam, leaving the headspace specified by your recipe—commonly around ¼ inch (6 mm) for jam.
Wipe the jar rims clean so jam residue does not interfere with sealing. Apply the lids according to their manufacturer’s instructions.
Place the jars upright in the water-bath canner. Ensure the water covers them by at least 1 inch.
Cover the canner and bring the water to a vigorous boil.
Once boiling, start the timer for the exact processing period required by your tested recipe and altitude.
When processing is complete, turn off the heat, remove the lid and wait approximately 5 minutes before removing the jars.
Lift them vertically with a jar lifter and place them on a towel or heat-resistant surface.
Do not tighten the bands or press the lids while the jars are cooling.
How Long Should Jam Jars Cool?
Leave processed jars undisturbed for 12–24 hours at room temperature.
After cooling, check each seal.
A properly sealed lid should be concave and should not flex up and down when pressed in the centre.
Remove the screw bands before long-term storage if recommended for your jar system, clean the outside of the jars, label them with the contents and date, and store them somewhere cool, dry and away from direct sunlight.
If a jar has not sealed properly, do not simply put it into the cupboard.
Refrigerate it and use it promptly, or reprocess it according to an approved procedure if the recipe and timing allow.
Can You Water Bath Can Any Homemade Jam Recipe?
No.
This is perhaps the most important practical rule in home canning.
Water-bath canning is suitable for properly acidified/high-acid foods prepared using tested formulations. It should not be treated as a universal method for preserving anything called “jam.”
Adding unusual low-acid ingredients, dramatically changing fruit proportions, reducing acid or altering a recipe can affect its safety.
For shelf-stable preserves, use recipes from recognised food-preservation authorities or tested instructions supplied with reputable canning pectin.
If you want to experiment freely with ingredients, make a small batch and keep it refrigerated or frozen instead of attempting to make it shelf-stable.
FAQs
1. Is 10 minutes enough to water bath can homemade jam?
A. For many tested traditional jam recipes, yes, and 10 minutes may actually exceed the sea-level processing requirement. However, the correct time depends on the specific recipe, jar size and altitude. Always follow the tested recipe rather than applying 10 minutes universally.
2. Do jam jars need to be sterilized before water-bath canning?
A. If the tested recipe calls for processing filled jars for less than 10 minutes, empty jars should be sterilized beforehand. When the processing time is 10 minutes or longer, pre-sterilization is generally unnecessary, though jars must still be clean and hot.
3. Can I make jam shelf-stable without water-bath canning?
A. Hot-filling and simply tightening or inverting the jar is not the recommended method for shelf-stable home-canned jam. Proper boiling-water processing according to a tested recipe provides a safer, reliable process. Alternatively, keep the jam refrigerated or frozen.
4. Why does jam need longer processing at high altitude?
A. Water boils at progressively lower temperatures as altitude increases. Longer processing compensates for the reduced boiling temperature. This is why people living in higher-altitude parts of India must pay particular attention to altitude adjustments in tested canning recipes.